Books aren’t just for reading, they’re versatile design elements that add character, color, and personality to any room. Whether stacked on coffee tables, arranged on floating shelves, or tucked into built-ins, books can anchor a space and reflect the homeowner’s interests. Interior book design goes beyond stuffing paperbacks onto shelves. It’s about curating displays that balance function with visual appeal, creating focal points that feel intentional rather than cluttered. This guide walks through practical techniques for displaying books as decor, DIY projects that showcase collections, and tips for integrating books with furniture and accessories throughout the home.
Key Takeaways
- Interior book design combines function and visual appeal by mixing vertical and horizontal orientations to create focal points that balance structure with personality.
- Color coordination by spine grouping or size arrangement transforms random collections into cohesive displays, while negative space keeps shelves curated rather than cluttered.
- Proper shelving materials and bracket spacing are critical—solid wood or 3/4″ plywood with brackets spaced 32 inches apart safely support heavy hardcover book loads.
- DIY book display projects like wall-mounted ledges, repurposed ladder shelves, and trim upgrades add custom character without advanced carpentry skills.
- Styling books with plants, picture frames, sculptural objects, and layered accessories creates depth and visual interest that transforms book collections into intentional home décor.
Why Interior Book Design Matters in Your Home Decor
Books bring texture, dimension, and a lived-in feel that few decorative objects can match. Unlike generic accessories, they tell a story about the people who live in the space. A well-designed book display adds warmth to minimalist interiors and grounds busier rooms with structure.
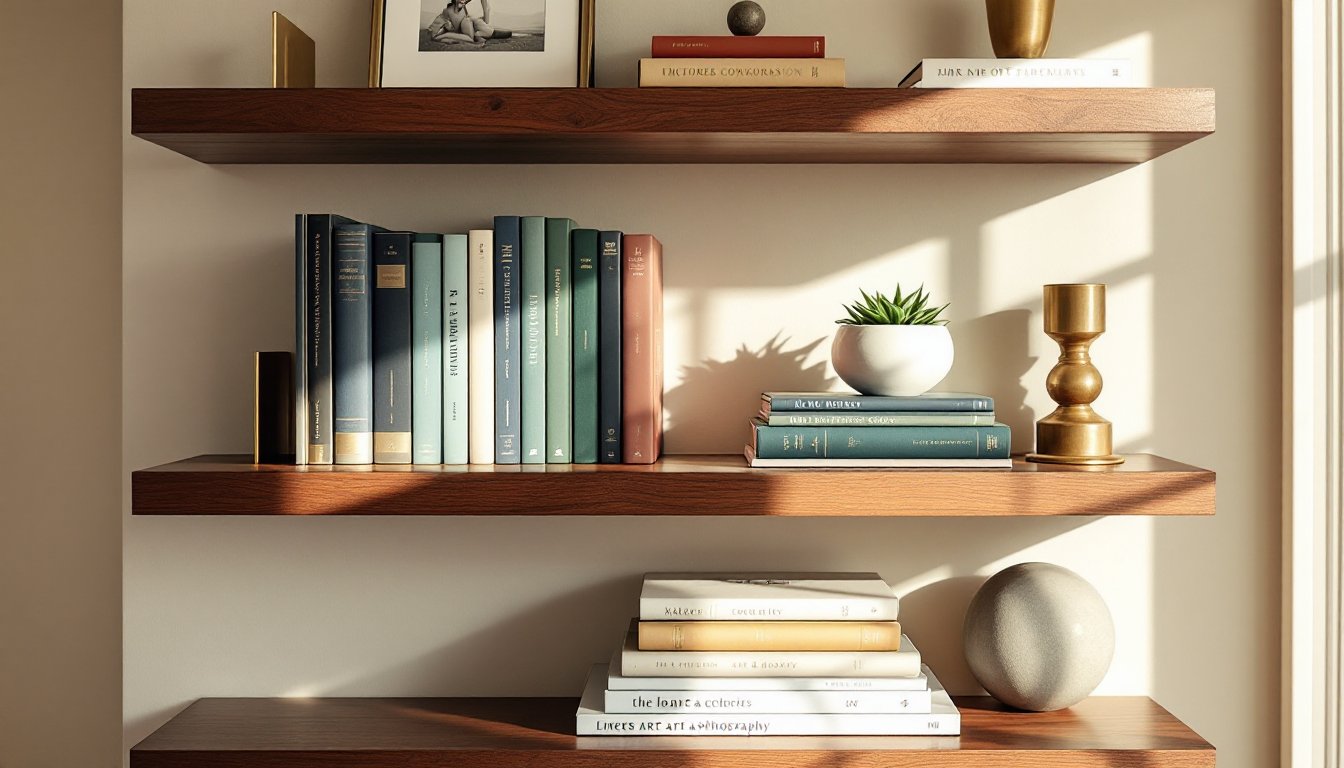
From a design standpoint, books offer vertical and horizontal lines that help define spaces. Tall hardcovers draw the eye upward, making ceilings feel higher, while horizontal stacks create visual weight and stability. The spines provide natural color variation, useful for tying together a room’s palette without buying new decor.
Practically speaking, books are budget-friendly design tools. Most homeowners already own them, and thrift stores or library sales offer inexpensive options for filling gaps. Unlike art or furniture, book displays are easy to refresh seasonally or when tastes change. They’re also forgiving, imperfect arrangements often look more authentic than overly styled setups.
For DIYers tackling open shelving or built-in projects, books provide flexible fill material. They soften hard architectural lines, add color to plain white cabinets, and help balance negative space. In rooms where structural changes aren’t feasible, rethinking book placement can shift the entire feel without touching a wall stud.
Creative Ways to Display Books as Decor Elements
The key to displaying books as decor lies in mixing orientations and creating visual rhythm. Instead of lining up every spine vertically, alternate with horizontal stacks of two to four books. This breaks up monotony and creates platforms for small objects like plants or picture frames.
Floating shelves work well for showcasing statement books. Install shelves at varying heights, stagger them by 8 to 12 inches vertically to avoid a rigid grid. Use keyhole brackets or concealed shelf pins rated for at least 25 pounds per linear foot if loading with hardcovers. Mount into wall studs whenever possible: toggle bolts work for drywall but check weight limits.
For coffee tables and console tables, create vignettes using books as risers. Stack two or three large-format books (art books, photography collections) and top with a decorative object. The books add height variation and ground lighter pieces like candles or small sculptures.
Bookends aren’t just functional, they’re design anchors. Use heavy materials like marble, cast iron, or solid wood to prevent toppling. Mixing bookend styles on the same shelf adds interest, but stick to a cohesive color family or finish (all brass, all matte black) to avoid visual clutter.
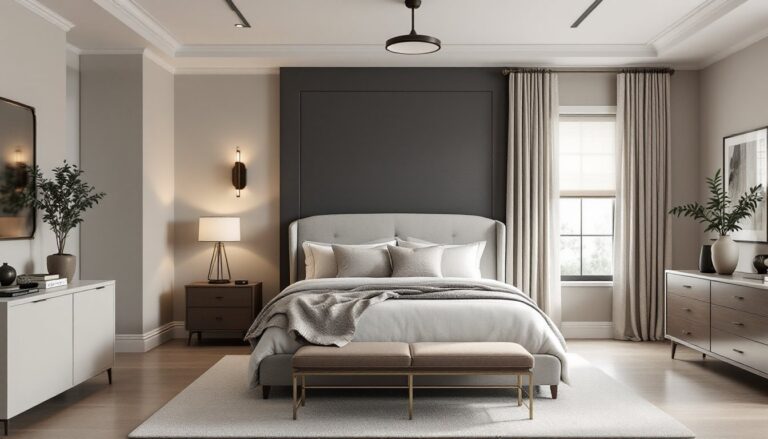
Corner spaces often go unused. Install a corner shelf unit or lean a tall ladder shelf to maximize vertical space. Books fill these areas naturally and soften sharp angles. In bedrooms, a small stack on a nightstand replaces generic tchotchkes and stays within reach for actual reading.
Color Coordination and Book Arrangement Techniques
Color coordination transforms random book collections into cohesive displays. The most common approach is organizing by spine color, grouping books in a gradient from warm to cool tones or arranging by color families (all blues together, all greens together). This creates a striking visual effect but makes finding specific titles harder, best for decorative rather than frequently-referenced books.
Alternatively, arrange by size and orientation. Place tallest books on the left or right of each shelf, stepping down gradually. This mimics how professional design layouts balance visual weight and feels more intentional than random placement.
For a neutral look, turn books backward to show page edges instead of spines. This works well in modern or Scandinavian interiors where color needs to be muted. Be aware this makes browsing your collection nearly impossible, use selectively on shelves meant purely for display.
Mixing book heights within horizontal stacks adds dimension. Place a thin paperback between chunky art books to create subtle layering. Leave some breathing room, cramming every inch of shelf space makes displays feel chaotic rather than curated.
When working with built-ins or floor-to-ceiling shelving, apply the rule of thirds. Fill roughly two-thirds of each shelf with books, leaving one-third for objects or negative space. This prevents the “library wall” effect and lets individual books stand out.
DIY Book Display Projects for Every Room
Building custom book displays doesn’t require advanced carpentry. Here are three projects suited for intermediate DIYers:
Wall-Mounted Book Ledges
These shallow shelves display books face-out, ideal for kids’ rooms or highlighting favorite covers.
Materials:
- 1×4 pine or poplar boards (actual dimensions 3/4″ x 3.5″)
- 1×2 lip board for the front edge
- Wood glue and 1-1/4″ finish nails
- L-brackets rated for 15+ lbs
- Sandpaper (120 and 220 grit)
- Primer and paint or stain
Steps:
- Cut 1×4 to desired length (24″ to 36″ works well). Cut 1×2 lip to match.
- Apply wood glue to the bottom edge of the 1×2. Position it flush with the front edge of the 1×4.
- Secure with finish nails every 6 inches. Wipe excess glue immediately.
- Sand all surfaces smooth, starting with 120 grit, finishing with 220.
- Apply primer, then two coats of paint or stain. Let cure 24 hours.
- Mount using two L-brackets spaced 16 inches apart, screwed into studs.
Safety note: Wear safety glasses when nailing and a dust mask when sanding.
Repurposed Ladder Bookshelf
An old wooden ladder becomes rustic book storage with minimal modification.
Materials:
- Vintage wooden ladder (6-8 feet tall)
- 1×10 or 1×12 boards for shelves
- Wood screws (1-5/8″)
- Sandpaper or wire brush
- Clear polyurethane (optional)
Steps:
- Clean the ladder thoroughly. Sand or wire-brush away loose paint and splinters.
- Measure the width between ladder rails at each rung where you want a shelf.
- Cut boards to fit, allowing 1/4″ clearance on each side.
- Rest boards on rungs. For added security, drill pilot holes and drive screws at an angle through the board into the rung.
- Apply polyurethane if desired, especially for painted or unfinished wood.
Lean the ladder against the wall at a slight angle (about 10-15 degrees) for stability. This works well in living rooms or home offices where modern functionality meets vintage charm.
Built-In Bookshelf Trim Upgrade
Existing basic shelving gets a custom look with applied molding.
Materials:
- Crown molding or decorative trim
- Wood filler
- Brad nails and nail gun (or hammer and finishing nails)
- Caulk and paint
Steps:
- Measure the top edge of your bookshelf unit.
- Cut crown molding to length using a miter saw. Cut corners at 45-degree angles for a clean join.
- Apply construction adhesive to the back of the molding.
- Position molding and secure with brad nails every 8-10 inches.
- Fill nail holes with wood filler. Let dry and sand smooth.
- Caulk any gaps between molding and shelf. Paint to match.
This simple addition makes builder-grade shelving look built-in and intentional.
Choosing the Right Furniture and Shelving for Book Displays
Not all shelving handles book weight equally. Standard particleboard shelving sags under heavy loads, hardcovers can weigh 2-3 pounds each, adding up fast. Look for shelves made from solid wood, plywood (3/4″ minimum), or metal.
For freestanding bookcases, check the weight capacity per shelf, usually listed in the product specs. Quality units support 40-60 pounds per shelf. Cheaper options often max out at 20-25 pounds. If specs aren’t available, the shelf material tells the story, solid hardwood or thick plywood beats hollow-core or thin pressed wood.
Bracket spacing matters for wall-mounted shelving. Space brackets no more than 32 inches apart for 3/4″ plywood or solid wood loaded with books. For lighter displays, 48-inch spacing works, but err on the side of caution. Mount brackets into wall studs using 2-1/2″ or 3″ wood screws, not just drywall anchors.
Built-in shelving offers the sturdiest option. If building custom, use 3/4″ plywood for shelves and add a 1×2 hardwood nosing to the front edge for a finished look and extra rigidity. For spans over 36 inches, add a center support or use adjustable shelf standards rated for heavy loads.
Cube storage units (like Kallax-style systems) work well for mixed displays combining books with baskets or bins. These distribute weight across a grid structure, reducing sag. Place heavier books in lower cubes for stability.
For rooms where traditional shelving doesn’t fit, consider console tables with lower shelves or storage benches with open cubbies. These multi-purpose pieces keep books accessible while serving other functions. Just verify the lower shelf isn’t purely decorative, some furniture uses thin material that won’t hold much weight.
Ladder shelves and leaning bookcases add visual interest but have lower weight limits than wall-mounted or freestanding units. Load these with lighter books or mix in decorative objects to avoid tipping. Always anchor leaning furniture to the wall using furniture straps, especially important in households with kids or pets.
Styling Books with Other Decorative Accessories
Books pair naturally with almost any decor style, but thoughtful accessory choices elevate the display. The goal is balance, books provide structure, accessories add personality and texture.
Plants soften hard book edges and introduce organic shapes. Small potted succulents, trailing pothos, or air plants work on shelves without needing much depth. Use books as risers to vary plant heights. Just skip plants that need frequent watering on shelves with paper-spine antiques.
Picture frames lean well against book stacks. Mix frame sizes, a 5×7 propped on three stacked books next to an unframed 8×10 creates visual variety. Stick to odd numbers (three frames, five books) for a more dynamic composition.
Decorative boxes or trays corral smaller items. A shallow tray on a bookshelf holds reading glasses, bookmarks, or a small candle, preventing clutter creep. Choose materials that contrast with your books, a brass tray against leather-bound books, a woven basket with bright paperbacks.
Sculptural objects add three-dimensional interest. Ceramics, small busts, or abstract shapes break up the linear quality of book spines. For cohesion, stick to two or three material types per shelf (example: books + brass objects + white ceramics).
Lighting transforms book displays from daytime decor to evening ambiance. Battery-operated puck lights installed on shelf undersides highlight book spines. Small table lamps on wider shelves add task lighting for reading nooks. For contemporary aesthetics, consider LED strip lights with dimmer controls tucked behind shelf lips.
Layering creates depth. Instead of lining everything against the back of a shelf, pull some items forward. Stack books, place a small object in front, lean a frame behind. This creates shadow lines and makes displays feel curated rather than stuffed.
Negative space is an accessory in itself. Resist the urge to fill every gap. Empty spots let the eye rest and emphasize what is displayed. Aim for shelves that feel 60-70% full rather than packed edge-to-edge.
Conclusion
Interior book design turns everyday objects into intentional decor without major renovation or expense. By mixing display techniques, building simple custom pieces, choosing proper shelving, and layering books with accessories, any homeowner can create displays that feel personal and polished. Start with one room or one shelf, experiment with arrangements, and adjust as collections grow. The best book displays evolve over time, just like the homes they inhabit.