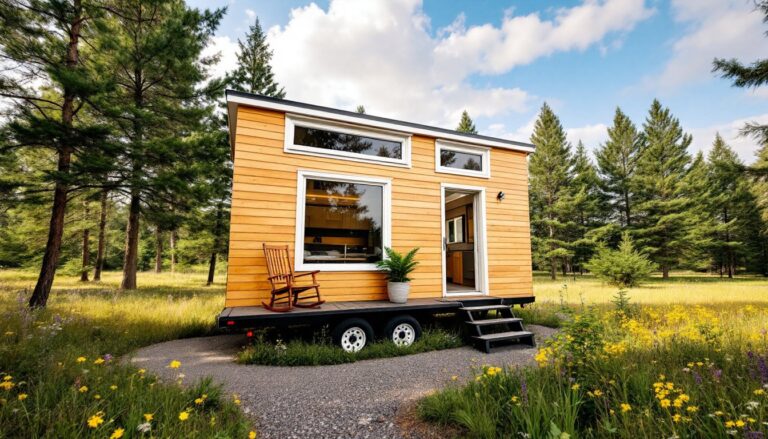
Turning a living room into a home theater doesn’t require tearing down walls or hiring an AV installer, though it does demand thoughtful planning and a willingness to run a few cables. The right combination of display, audio, seating, and lighting can deliver an experience that rivals commercial theaters, all without sacrificing the room’s everyday functionality. Whether working with a compact 12×14 space or a sprawling great room, homeowners can achieve cinema-quality results by focusing on layout, equipment that matches the room’s dimensions, and details like viewing angles and sound reflection. This guide walks through the practical decisions that separate a mediocre TV corner from a true home theater experience.
Key Takeaways
- A living room home theater setup requires matching screen size to viewing distance—aim for a 75- to 85-inch display at 10 feet of seating to avoid eye strain and achieve an immersive 30- to 40-degree viewing angle.
- Quality audio separates true home theaters from standard TV corners; invest in a 5.1 surround system with an AV receiver and prioritize the center channel speaker, which handles 60% of movie dialogue.
- Subwoofer placement matters more than the subwoofer itself—test positions around the room’s perimeter to find where bass sounds tightest and most even, avoiding corner placement that creates boomy sound.
- Control ambient light with blackout curtains, motorized shades, smart dimmable bulbs, and bias lighting behind the display to maintain contrast and prevent image washout.
- Plan electrical infrastructure before equipment purchase by counting all devices that need power and installing dedicated 20-amp circuits or additional outlets to avoid hazardous extension cords.
- Cable management through CL2-rated in-wall conduit or paintable raceways keeps the space aesthetic while proper labeling and surge protection ensure long-term functionality and safety.
Planning Your Living Room Theater Layout
Start by measuring the room’s dimensions, length, width, and ceiling height, and noting the location of windows, doors, electrical outlets, and any HVAC vents. These factors dictate screen placement, speaker positioning, and power routing. Most living rooms aren’t perfectly rectangular, so identify the longest uninterrupted wall for the display and mark any architectural quirks like angled ceilings or support columns that could interfere with sightlines or speaker placement.
Avoid placing the screen directly opposite large windows. Even with blackout curtains, ambient light becomes a constant battle. If window placement is unavoidable, budget for motorized shades or cellular blackout blinds with side channels to eliminate light bleed. For rooms with open floor plans that flow into kitchens or dining areas, consider how ambient noise and foot traffic will affect viewing. A sectional sofa or area rug can help define the theater zone without requiring permanent barriers.
Electrical planning matters more than most DIYers anticipate. Count the devices that need power: display, AV receiver, streaming box, gaming console, subwoofer, and any smart home hubs. If the nearest outlet sits eight feet away or only offers two plugs, plan to install additional outlets or a dedicated 20-amp circuit. Running extension cords under rugs or along baseboards creates trip hazards and fire risks. If adding outlets, consult local electrical codes or hire a licensed electrician, most jurisdictions require permits for new circuits.
Choosing the Right Display for Your Space
Screen size should match viewing distance, not budget or aspirations. The Society of Motion Picture and Television Engineers recommends a viewing angle of 30 to 40 degrees for an immersive experience. For a seating distance of 10 feet, that translates to a 75- to 85-inch display. Go smaller and the image feels distant: go larger and viewers strain their necks tracking action across the screen.
OLED panels deliver perfect blacks and infinite contrast ratios, making them ideal for rooms with good light control. Models from LG and Sony dominate this category, with 2025 and 2026 iterations offering improved brightness (1,000+ nits peak) that handles mixed lighting better than earlier generations. But, OLED panels carry a risk of burn-in if static UI elements (like news tickers or game HUDs) linger too long. For living rooms doubling as gaming hubs or always-on smart displays, QLED or Mini-LED LCD panels offer better longevity. Samsung and TCL produce models with quantum dot color and local dimming zones that rival OLED contrast at a lower price point.
Projectors deserve consideration in rooms where a 100+ inch image makes sense and ambient light can be controlled. Short-throw projectors sit close to the wall and work in tighter spaces, while traditional long-throw models require 10 to 15 feet of throw distance. Budget $1,200 to $3,000 for a 4K HDR projector with at least 2,500 lumens of brightness, and factor in the cost of a quality projection screen, painted walls rarely deliver acceptable image quality. Projectors do require occasional bulb or laser replacements, and setups involving ceiling mounts may need professional installation to ensure level alignment.
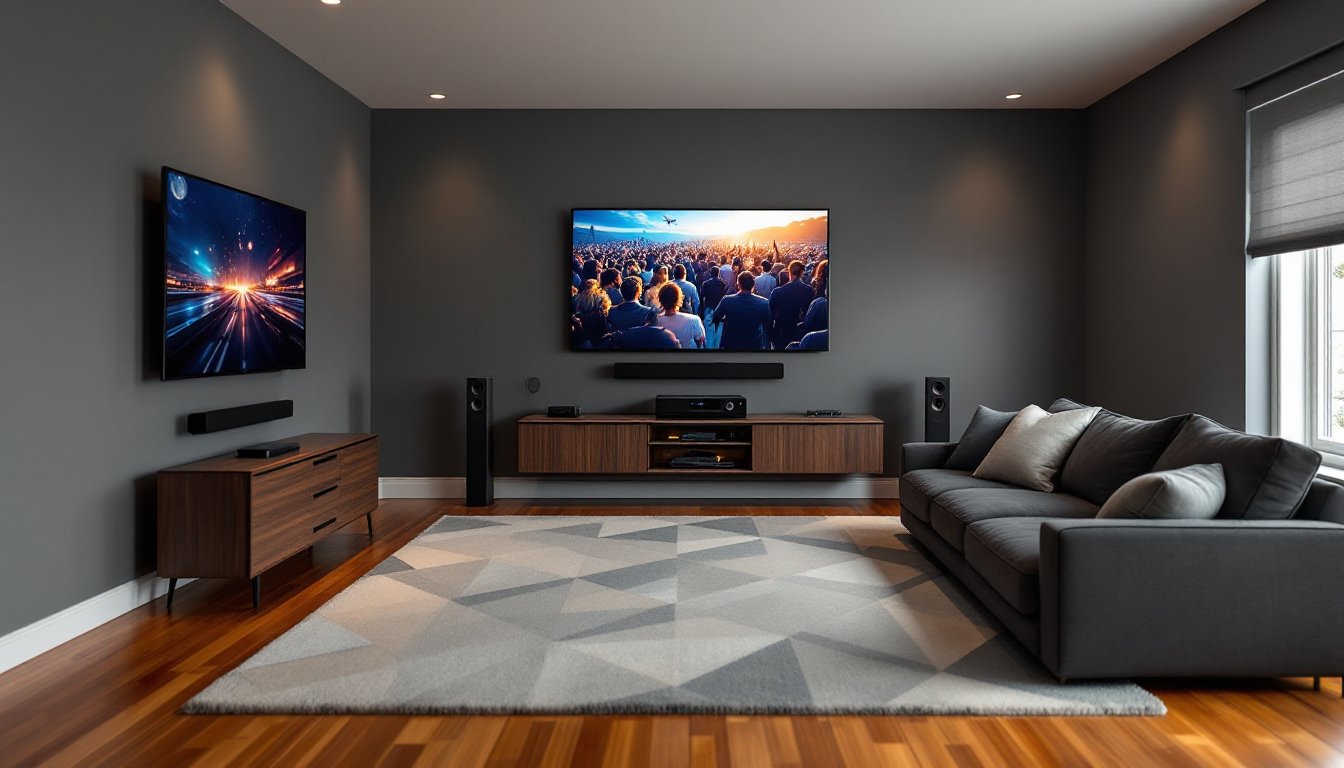
Audio Systems That Deliver True Theater Sound
The built-in speakers on even high-end TVs can’t reproduce the dynamic range or directional cues that define theatrical audio. A proper setup starts with an AV receiver that decodes surround formats like Dolby Atmos and DTS:X. Entry-level receivers with 5.1 channel support start around $300, while 7.2 or 9.2 models with Atmos capability run $600 to $1,200. Match the receiver’s power output to the speakers’ sensitivity, underpowered speakers distort at high volume, while overpowered setups risk blowing drivers.
A 5.1 configuration remains the most practical choice for living rooms: left, center, and right front speakers, two rear surrounds, and a subwoofer. The center channel handles 60% of a movie’s dialogue, so invest here first, a quality center like a three-way bookshelf design with a dedicated midrange driver ensures voices stay clear even during explosions. Front left and right speakers can be tower or bookshelf models: towers deliver deeper bass extension but require more floor space. Surround speakers don’t need to match the front array’s quality, budget models work fine for ambient effects.
Subwoofer placement affects bass response more than the subwoofer itself. Start by placing it at the main seating position (yes, on the couch), play bass-heavy content, then crawl around the room’s perimeter listening for the spot where bass sounds tightest and most even. That’s where the subwoofer goes. Corner placement boosts output but can create boomy, one-note bass. Many home theater systems now include wireless subwoofers that simplify placement without sacrificing performance. For rooms with challenging acoustics, high ceilings, hard floors, or lots of glass, acoustic panels on the front wall and first reflection points (side walls near the front speakers) tame echoes without requiring full room treatment.
Seating Arrangements and Viewing Distance
Viewing distance should fall within 1.5 to 2.5 times the screen’s diagonal measurement for 4K content. A 75-inch screen suggests seating between 9.5 and 15.5 feet away. Closer than that and pixel structure becomes visible: farther and fine details disappear. For households mixing movie nights with sports viewing or gaming, aim for the middle of that range, about 12 feet for a 75-inch display.
Sectionals work well because they accommodate multiple viewers without creating bad sightlines, but verify that armrests or chaise extensions don’t block the subwoofer or rear speakers. If using recliners, measure the fully reclined footprint before buying, many models extend 24 inches or more, which can crowd walkways or push seating too far forward. Home theater seating with built-in cup holders and storage sounds appealing but often locks viewers into fixed positions. Standard furniture offers more flexibility for repositioning as the room’s use evolves.
For dedicated setups, consider risers or platforms for second-row seating. A modest 8- to 12-inch elevation ensures viewers in back aren’t staring at the heads in front. This works best in larger rooms (16×20 or bigger) where space allows for two distinct seating zones. When evaluating home theater systems, keep room layout and seating capacity in mind to ensure components scale with the space. Build risers with 2×8 or 2×10 framing and ¾-inch plywood tops, securing them to wall studs if possible to prevent wobble. Carpet the top surface to reduce footfall noise that transfers through the structure.
Lighting Control and Ambiance for Movie Nights
Ambient light is the enemy of contrast. Even a small amount of stray light washes out blacks and flattens the image. Install blackout curtains or roller shades on all windows in the viewing area, cellular shades with side channels block more light than standard roller blinds. For rooms with recessed can lights, replace standard bulbs with smart LEDs that dim to near-zero or add a dimmer switch. Philips Hue and LIFX bulbs integrate with most smart home platforms and allow color temperature adjustments, so lights can shift from daylight white for cleaning to warm amber for evening viewing.
Bias lighting, a strip of LED tape mounted behind the display, reduces eye strain by providing a subtle ambient glow that makes the screen’s edges less stark against a dark wall. Use 6500K (daylight) LEDs for bias lighting, not RGB strips set to blue or purple. The goal is neutral illumination that doesn’t shift the perceived color temperature of the image. A 6- to 10-foot USB-powered LED strip costs $15 to $30 and sticks directly to the back of the TV or monitor.
Floor-level pathway lighting prevents stubbed toes during movie intermissions without flooding the room with light. LED strip lights along baseboards or under furniture work well, especially when connected to motion sensors or dimmed to 10-20% brightness. Avoid overhead lighting during viewing, downlights create glare on screens and glasses. Contemporary home design trends increasingly favor layered lighting that supports multiple room functions, which aligns perfectly with home theater needs. If the room doubles as a workspace or play area, plan separate lighting scenes: full brightness for daytime use, moderate levels for casual TV, and near-darkness for movie mode.
Cable Management and Tech Organization
Visible cables ruin the aesthetic of even the best home theater. In-wall cable routing is the cleanest solution but requires cutting drywall and running cables through wall cavities. Use CL2- or CL3-rated cables for in-wall runs, these meet fire safety standards and won’t void insurance if inspected. Retrofit cable management kits include low-voltage mounting brackets and brush plates that make wall penetrations look intentional. Run HDMI, speaker wire, and power separately to avoid interference, and leave a pull string in the conduit for future cable additions.
For renters or anyone avoiding wall cuts, cable raceways or cord covers route cables along baseboards and up walls. Paintable models from Legrand or Wiremold blend into wall color when finished. Use adhesive-backed Velcro straps or cable clips to bundle cables behind the TV stand or AV rack, zip ties work but aren’t adjustable. Label every cable at both ends with a label maker or masking tape and marker. Three months later, when troubleshooting a failed connection, labels save hours of guesswork.
Power management matters. A surge protector with at least 2,000 joules of protection guards equipment from voltage spikes, and models with coaxial and Ethernet protection cover cable/fiber internet and antenna connections. For setups with multiple components, a rack-mounted power conditioner with sequential turn-on prevents the inrush current spike that occurs when everything powers up simultaneously. Keep the AV receiver and other heat-generating components on open shelves, stacking them in enclosed cabinets without ventilation shortens lifespan and risks thermal shutdowns. If using a closed cabinet, install AC Infinity or similar quiet cooling fans to exhaust hot air.
Conclusion
A living room home theater rewards attention to detail, proper viewing distance, matched speaker placement, controlled lighting, and clean cable routing make the difference between a functional setup and one that genuinely rivals commercial theaters. The projects here don’t require advanced carpentry or electrical skills, but they do demand careful measurement and a willingness to plan before buying. Homeowners who invest time in layout and equipment selection end up with a space that serves movie nights, game days, and everyday TV without compromise.