Between 2014 and 2017, The Great Interior Design Challenge quietly reshaped how everyday homeowners thought about DIY design. The BBC Two competition didn’t just feature professionals, it put amateur designers in real homes with tight budgets and tighter deadlines. The result? A blueprint for accessible, budget-conscious makeovers that proved you don’t need a massive renovation fund to transform a room. For DIYers tired of celebrity designer shows with unrealistic price tags, this series offered something different: practical techniques, honest mistakes, and design solutions that translated directly to real-world projects.
Key Takeaways
- The Great Interior Design Challenge demonstrated that thoughtful design and creative execution matter far more than large budgets—contestants transformed ordinary UK homes with just £1,000–£1,500 per room using practical, achievable techniques.
- Proper surface preparation, including deglossing, priming, and allowing adequate drying time, is non-negotiable for paint adhesion and professional-looking results in any DIY project.
- Strategic focal points—one or two standout design elements like an accent wall, statement lighting, or bold rug—create cohesive spaces without overwhelming rooms with competing visual interest.
- Budget-friendly techniques such as salvage materials, DIY soft furnishings, wallpaper accent walls, and lighting swaps deliver high-impact transformations that today’s homeowners can replicate in their own makeovers.
- Frontloading planning, measuring twice, and knowing when to buy ready-made versus build custom saves both time and money, a lesson the show’s most successful contestants applied consistently.
- The show’s legacy reinforced that design is accessible to amateurs—honest mistakes and real-world constraints are part of the process, and resilience matters more than perfection when tackling DIY projects.
What Made The Great Interior Design Challenge So Popular?
The show’s appeal came down to three factors: real homes, real budgets, and real people. Unlike glossy makeover programs filmed in studios or high-end properties, contestants worked in ordinary homes across the UK, terraced houses, bungalows, council flats. Homeowners handed over their rooms to strangers with varying skill levels, creating genuine stakes.
Budget constraints forced creativity. Designers typically worked with £1,000 to £1,500 per room (roughly $1,200 to $1,900 USD at the time), which meant hunting for salvage materials, DIY builds, and strategic splurges. Viewers saw contestants stretching paint coverage, building furniture from reclaimed lumber, and making tough calls between new flooring or a statement light fixture.
The amateur angle mattered. Contestants weren’t seasoned pros, they were graphic designers, teachers, or stay-at-home parents with a passion for interiors. Their learning curve mirrored what home DIYers face: misjudging measurements, wrestling with unfamiliar power tools, or discovering that “distressed finish” can look more “accidentally ruined” if you skip proper prep work.
Judges Daniel Hopwood and Kelly Hoppen brought credibility without condescension. Hopwood, known for his architectural approach, focused on spatial planning and function. Hoppen, a luxury designer, pushed contestants on finishing details, the difference between a painted IKEA hack and one that looks custom often came down to her critiques about hardware, trim, or how well seams were caulked.
Format and Structure of the Competition
Each episode followed a straightforward format: three amateur designers, three rooms in neighboring homes, and 48 hours to complete a makeover. The regional structure added stakes, contestants competed in heats across different UK regions (Scotland, Wales, the North, the Midlands, etc.), with regional winners advancing to a grand final.
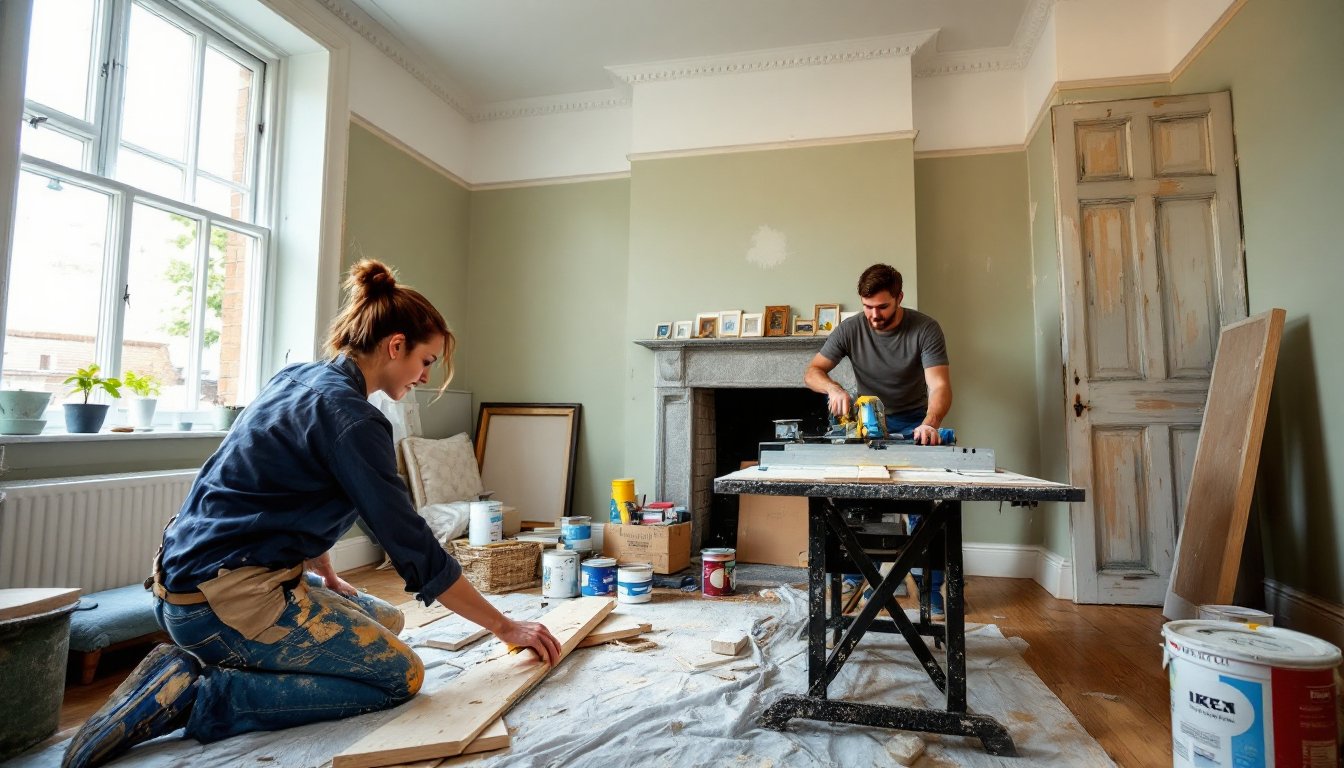
The 48-hour deadline wasn’t just TV drama, it forced the kind of decision-making DIYers face on real projects. Do you spend four hours building custom shelving or buy ready-made units and use that time for better wall prep? Contestants who frontloaded planning and prep work (measuring twice, ordering materials early, prepping surfaces the first evening) consistently outperformed those who winged it.
Rooms ranged from living rooms and bedrooms to kitchens and bathrooms, though the show avoided full gut renovations or anything requiring licensed trades. No one moved load-bearing walls or rewired circuits, a smart choice that kept projects in DIY territory. Contestants could paint, install flooring (vinyl, laminate, or click-lock), build furniture, hang wallpaper, or swap light fixtures, but structural or code-related work stayed off-limits.
Homeowner reveals at the end provided real feedback. Some loved their new spaces: others politely masked disappointment. That honesty set the show apart from programs where every reveal ends in tears of joy. When a contestant missed the mark, say, installing dark wainscoting that made a small room feel like a cave, judges and homeowners said so.
Key Designers and Hosts Who Shaped the Show
Tom Dyckhoff hosted the first two series, bringing an architectural critic’s perspective. He kept commentary focused on design principles, scale, proportion, light, rather than trends. His successor, Daniel Hopwood, took over hosting duties in series three while continuing to judge, which streamlined the format.
Kelly Hoppen’s influence showed in how contestants approached texture and layering. Her signature neutral palettes and emphasis on tactile materials (linen, wool, natural wood grain) pushed DIYers to think beyond paint color. Viewers learned that a beige room isn’t boring if you mix matte and gloss finishes, combine smooth plaster with rough brick, or layer multiple fabric weights.
Sophie Robinson joined as a judge in later series, adding a more eclectic, color-forward voice. Where Hoppen favored restraint, Robinson encouraged bold wallpaper, jewel tones, and mixing patterns, useful counterbalance for DIYers stuck in safe, neutral ruts.
Contestants themselves became micro-influencers. Winners like Bangor’s Daniel Monteiro went on to design careers, but even early-round exits gained followings. Their Instagram feeds and blogs showed the same projects viewers had seen on TV, now six months or a year later, proof that quick makeovers could hold up or, in some cases, need touch-ups when paint didn’t adhere properly or DIY upholstery started pilling.
Design Lessons Homeowners Can Apply Today
Several recurring lessons translated directly to DIY projects. Measure everything twice, then add a margin. Contestants who eyeballed curtain lengths or assumed walls were square paid for it in mismatched seams and gapping trim. Use a laser level for chair rails or picture ledges, walls are rarely plumb, and a 1/4-inch drift over eight feet becomes obvious.
Prep work isn’t optional. Judges consistently called out paint that didn’t adhere because someone skipped deglossing or primer. If you’re painting over oil-based trim with latex, you need a bonding primer like Zinsser B-I-N or equivalent shellac-based product. Viewers saw contestants rush this step and end up with paint that chipped during the reveal.
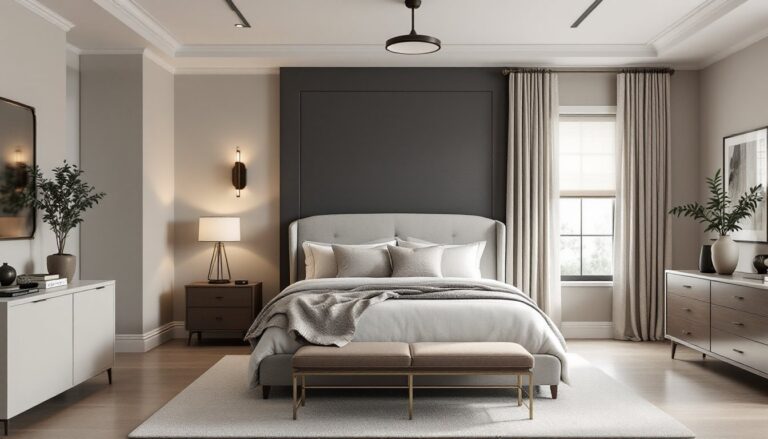
Focal points matter. Rooms that tried to do everything, bold wallpaper, statement lighting, a gallery wall, and colorful furniture, felt chaotic. Successful spaces picked one or two heroes (a painted accent wall, a DIY headboard, a striking rug) and kept the rest supporting cast.
Another practical takeaway: know when to buy vs. build. Custom built-ins look great, but if you’re not confident with a miter saw and pocket-hole jig, the time and material cost may exceed ready-made options. The show featured plenty of IKEA hacks, contestants would buy basic BILLY bookcases and add trim, paint, or custom doors to elevate them. That’s a smarter play than attempting complex joinery without the skills.
Budget-Friendly Techniques Featured on the Show
Paint as transformation: The single most common technique. Contestants painted everything, walls, floors, furniture, radiators, even tile in bathrooms (using specialty tile paint and proper prep). A £30 tin of floor paint in a bold color turned dated parquet into a feature. One gallon of interior paint covers roughly 350-400 sq ft with one coat: most accent walls need two coats for even color, so budget accordingly.
Salvage and reclaim: Architectural salvage yards provided cheap materials, old doors became headboards, reclaimed scaffolding boards became shelving (note: scaffolding lumber is often rough-sawn: you’ll need to sand and seal it). Contestants also shopped charity shops for furniture to refinish. Strip old varnish with Citristrip or similar low-VOC stripper, sand to 220-grit, then apply stain or paint and a protective topcoat.
Wallpaper accent walls: Full-room wallpaper gets pricey fast, but one accent wall makes impact for under £50. Peel-and-stick options (like those from Tempaper or Spoonflower) go up easier than traditional paste, though corners and seams still require precision. Use a straight edge and sharp utility knife for clean cuts at ceiling lines and baseboards.
DIY soft furnishings: Contestants sewed cushions, reupholstered chairs, and made curtains to save hundreds. If you’re new to sewing, start with pillow covers, they’re forgiving and require only basic straight stitching. Use a heavy-duty needle (size 16 or 18) for canvas or upholstery-weight fabric. No-sew hems using fabric glue or iron-on tape work for curtains if you don’t own a machine.
Lighting upgrades: Swapping a builder-grade ceiling fixture for a pendant or chandelier is a high-impact, low-cost change. Most DIYers can handle this, turn off the circuit breaker (not just the switch), confirm power is off with a voltage tester, then connect like-colored wires (black to black, white to white, green or bare copper to ground). If your ceiling box isn’t rated for fixtures over 50 lbs, install a fan-rated pancake box or add blocking between joists. Codes vary, but NEC Article 314 governs box support.
The Show’s Legacy and Influence on DIY Design Culture
The Great Interior Design Challenge ended in 2017, but its impact persists. It helped normalize the idea that good design isn’t about big budgets, it’s about thoughtful choices and decent execution. The show aired alongside the explosion of Instagram and Pinterest, and its aesthetic, layered, textured, budget-conscious, aligned with the shift away from 2000s-era matchy-matchy furniture sets toward more curated, personal spaces.
The format influenced other competitions. Shows like Design at the Center and Interior Design Masters (also BBC) borrowed the amateur-designer, real-home model. The emphasis on budget transparency and time constraints made design feel less aspirational and more achievable.
For DIYers, the show’s legacy lives in specific techniques now standard in online tutorials: using painter’s tape for crisp lines on geometric wall designs, mixing high-street and vintage finds, or the strategic use of one bold element in an otherwise neutral room. It also reinforced the importance of proper surface prep, a lesson many learned the hard way when their own painted furniture projects didn’t hold up.
The show’s honest portrayal of mistakes, poorly planned layouts, clashing colors, DIY fails, gave permission to experiment. Not every project will be Instagram-perfect, and that’s fine. The contestants who recovered from setbacks (repainting a too-dark wall at 2 a.m., abandoning a half-built project for a simpler plan) demonstrated resilience that’s central to real DIY work.
Conclusion
The Great Interior Design Challenge proved that thoughtful design and solid DIY skills trump unlimited budgets. The techniques, strategic paint, salvaged materials, one standout feature, remain as relevant in 2026 as they were during the show’s run. For homeowners tackling their own makeovers, the real takeaway is simple: measure carefully, prep thoroughly, and don’t be afraid to learn as you go.