Great interior design isn’t about spending a fortune on furniture or following every trend that rolls through social media. It’s about understanding spatial relationships, light behavior, and how materials interact in real-world conditions. The professionals who’ve earned the title “master” didn’t get there by winging it, they learned foundational principles, studied human behavior in spaces, and practiced relentlessly. Whether you’re planning a single-room refresh or a whole-home renovation, applying the same strategic thinking that top designers use will save you money, time, and the frustration of a space that just doesn’t work.
Key Takeaways
- Masters of interior design combine technical knowledge with creativity, understanding spatial relationships, building codes, material specifications, and how spaces function for real families.
- The 60-30-10 color rule and strategic use of balance, proportion, and scale prevent costly design mistakes and ensure rooms feel both exceptional and livable.
- Professional lighting design requires three layers—ambient, task, and accent light—with proper spacing and dimmer switches for flexibility across different functions.
- Successful interior design projects depend on thorough prep work: accurate measurements, clearly defining the room’s function first, establishing focal points, and knowing when structural or electrical work requires licensed professionals.
- You can develop interior design skills through formal education, online courses, apprenticeships, or self-directed study with trade publications and material showroom visits.
What Makes a Master Interior Designer Stand Out
A master designer doesn’t just arrange furniture, they solve problems. They assess how a family actually lives, where light falls at different times of day, and how traffic flows through a room. They understand load-bearing walls versus partition walls, know when a permit is required, and can read architectural drawings.
Technical knowledge separates hobbyists from masters. Top designers know that nominal 2×4 lumber actually measures 1.5″ x 3.5″, that drywall adds thickness to wall dimensions, and that flooring transitions require underlayment height considerations. They’re familiar with IRC (International Residential Code) guidelines for egress windows, ceiling heights, and stair dimensions, critical when a design involves structural changes.
But technical skill alone isn’t enough. Masters develop a trained eye for proportion, an instinct for color relationships, and the experience to anticipate how a material will age. They know that paint sheen affects perceived color (flat absorbs light, high-gloss reflects it), that natural wood flooring needs acclimation time before installation, and that tile layout affects how large or small a room feels.
The designers featured among the world’s leading professionals share one trait: they balance creativity with practicality. Their spaces look exceptional in photos but also function flawlessly for the people who live in them. That’s the standard worth aiming for in your own projects.
Core Principles Every Design Master Follows
Professional designers rely on a toolkit of principles that guide every decision, from furniture placement to hardware selection. These aren’t abstract concepts, they’re practical frameworks that prevent common mistakes.
Balance, Proportion, and Scale in Every Room
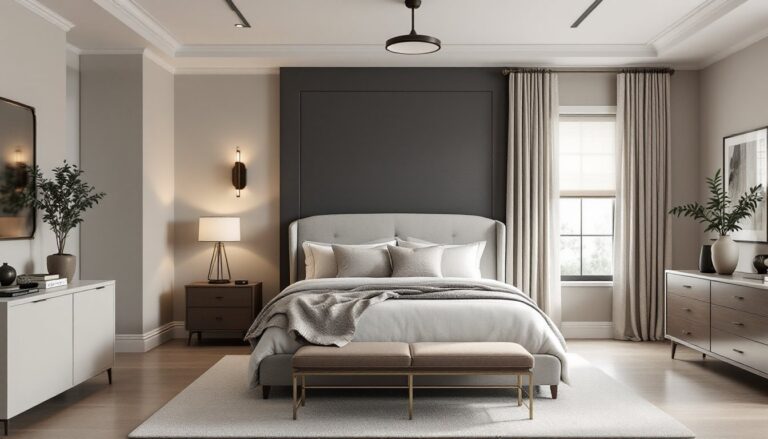
Balance refers to visual weight distribution. Symmetrical balance (matching nightstands flanking a bed) feels formal and restful. Asymmetrical balance (a large sofa balanced by two chairs and a side table) feels more dynamic but requires careful spacing. Radial balance (furniture arranged around a central focal point like a fireplace) works well in conversation areas.
Proportion is the relationship between objects. A common error: mounting a TV that’s too small for the wall or hanging artwork too high. The rule of thumb for art is center it at 57-60 inches from the floor (gallery height), but adjust based on sightlines from seating. For TV mounting, the center of the screen should sit at eye level when seated, usually 42-48 inches from the floor.
Scale addresses size relationships. An oversized sectional can swallow a small living room, while dainty furniture in a large space looks lost. Measure your room and sketch layouts to scale before buying. Standard sofa depth runs 36-40 inches: add at least 30 inches of clearance for walkways, 48 inches for high-traffic areas.
When working with existing architecture, these principles help you work with the space instead of fighting it. Crown molding looks proportional when it’s roughly one inch of projection per foot of ceiling height. Chair rail typically sits 32-36 inches from the floor, about one-third of an eight-foot wall height.
Color Theory and Palette Selection
Masters use color strategically, not randomly. The 60-30-10 rule provides a reliable framework: 60% dominant color (usually walls), 30% secondary color (upholstery, curtains), and 10% accent color (pillows, art, accessories).
Understand undertones, they’re the reason your “white” paint looks pink in morning light. Warm whites contain yellow or red undertones: cool whites lean blue or green. Test paint samples on multiple walls and observe them at different times of day before committing. Paint coverage runs about 350-400 square feet per gallon for flat or matte finishes, less for textured walls or deep colors requiring multiple coats.
Top designers featured in curated global portfolios often use neutral bases with purposeful accent colors. This approach allows flexibility, you can shift the mood by swapping textiles and accessories without repainting.
Lighting affects color perception dramatically. Incandescent bulbs (2700-3000K) add warmth: daylight bulbs (5000-6500K) render colors more accurately but can feel harsh in living spaces. LED technology now offers tunable white temperatures, useful for spaces serving multiple functions.
How to Apply Professional Design Techniques at Home
You don’t need a design degree to use professional strategies. Start with the same process the pros follow.
Step 1: Measure everything. Not just room dimensions, window heights, ceiling heights, door swing radius, radiator or HVAC vent locations. Note which walls are exterior (thicker, often load-bearing), where electrical outlets sit, and any architectural quirks. Use these measurements to create a scale floor plan on graph paper or free software like SketchUp.
Step 2: Define function before form. How will you actually use this space? If your living room needs to accommodate game nights, TV watching, and toddler play, that dictates furniture layout more than any stylistic preference. Be honest about lifestyle, white linen sofas aren’t practical with muddy dogs, no matter how good they look in magazines.
Step 3: Establish a focal point. Every room needs visual hierarchy. It might be a fireplace, a picture window, or a feature wall. Arrange furniture to complement this focal point, not compete with it. If you’re creating a focal point from scratch (accent wall, built-in shelving), position it opposite the main entry so it’s the first thing you see.
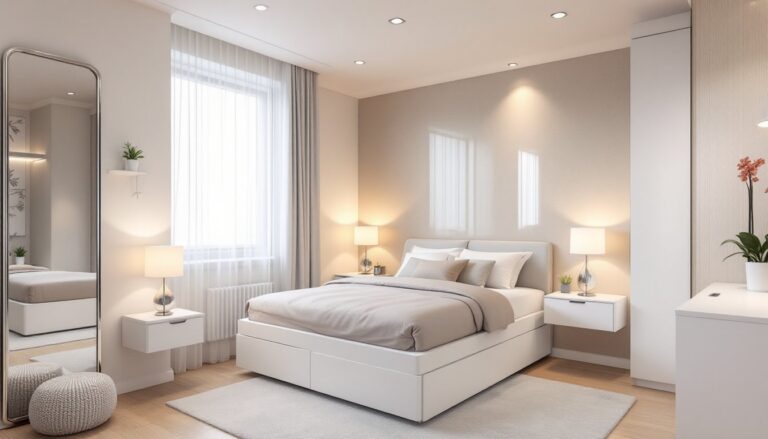
Step 4: Layer lighting. Professional designers use at least three types: ambient (overhead or recessed fixtures providing general illumination), task (focused light for reading, cooking, or grooming), and accent (highlighting art or architecture). Dimmer switches add flexibility. When installing recessed lights, space them about four to six feet apart for even coverage, positioned 18-24 inches from walls to avoid shadowing.
Step 5: Prep surfaces properly. This matters more than most DIYers realize. Before painting, fill nail holes with spackling compound, sand smooth, and prime. Before installing peel-and-stick tile or wallpaper, clean walls with TSP (trisodium phosphate) to remove oils and residue, adhesion failures almost always trace back to poor prep. Before laying flooring, check subfloor for level (use a 6-foot level: variations over 3/16 inch require correction).
Step 6: Invest in quality where it counts. For upholstered furniture, kiln-dried hardwood frames and eight-way hand-tied springs outlast particleboard and sinuous springs. For paint, premium brands contain better pigments and binders, you’ll need fewer coats and get better coverage. But you can save on decorative accessories and art, where trends shift faster than wear-out.
Step 7: Understand when to call a professional. Moving electrical outlets or switches requires a licensed electrician in most jurisdictions. Removing walls requires knowing whether they’re load-bearing (if ceiling joists run perpendicular to the wall, it might be structural). HVAC modifications, gas line work, and anything involving structural beams or headers needs a professional. Permits exist to ensure safety, skipping them can void insurance coverage and complicate future home sales.
The best international designers succeed because they respect both aesthetics and building science. Replicate that mindset in your DIY projects.
Learning From the Best: Where to Study Interior Design Mastery
If you’re serious about developing design skills beyond casual DIY, several paths offer structured learning.
Formal education provides comprehensive training. Accredited interior design programs (look for CIDA accreditation, Council for Interior Design Accreditation) cover building codes, AutoCAD, lighting design, textiles, and business practices. Programs typically require 120+ credit hours and prepare graduates for NCIDQ certification (National Council for Interior Design Qualification), required for licensure in many states. Expect a significant time and financial investment.
Online courses and certificates offer flexibility. Platforms like Coursera, LinkedIn Learning, and Skillshare host classes in specific skills, color theory, space planning, SketchUp modeling. These won’t qualify you for professional licensure but can sharpen practical skills. Look for courses taught by working designers with real project portfolios.
Trade apprenticeships provide hands-on learning. Many established design firms hire junior designers or assistants, roles that combine mentorship with real project exposure. You’ll learn material sourcing, client management, and vendor relationships alongside design theory.
Self-directed study works if you’re disciplined. Start with foundational texts: Francis D.K. Ching’s “Interior Design Illustrated” covers technical drawing and spatial principles: “The Interior Design Reference & Specification Book” by Chris Grimley and Mimi Love addresses materials and standards. Subscribe to trade publications like Interior Design Magazine or Architectural Digest to study current work.
Job site observation teaches lessons no classroom can. Visit job sites (with permission), attend local home shows, and talk to tradespeople. You’ll learn why designers spec certain materials, how installation sequences affect design choices, and what details separate quality work from shoddy shortcuts.
Material libraries and showrooms offer tactile education. Most major cities have design centers where you can see finish samples, compare fabric weights, and understand how materials photograph versus how they look in person. Many showrooms allow public access or host educational events.
The path you choose depends on your goals. Redesigning your own home? Self-directed study plus strategic online courses might suffice. Pursuing a design career? Formal education and certification open professional doors and teach liability considerations, contracts, and code compliance that hobbyists can safely ignore.
Conclusion
Master designers aren’t born with innate taste, they’ve studied principles, learned from failures, and practiced relentlessly. The same strategic thinking that guides their work applies to your dining room refresh or basement renovation. Measure carefully, understand the rules before breaking them, respect the building science behind the aesthetics, and don’t skip prep work. Start with one room, apply these principles, and build your skills project by project.