A faulty toilet can derail your entire day, that constant running, the weak flush, or the visible stains that won’t come clean. Rather than calling a plumber and waiting weeks, many homeowners discover that a DIY toilet renovation is entirely within reach. Replacing a toilet is one of the most straightforward home improvement projects you can tackle, requiring just a few basic tools, a couple of hours, and honest attention to detail. This guide walks you through everything: why upgrading matters, what you’ll need, how to remove the old unit safely, and how to install your new one so it runs reliably for years. Whether you’re doing a quick cosmetic refresh or a full DIY bathroom renovation, starting with the toilet is a smart, confidence-building first step.
Key Takeaways
- A DIY toilet renovation saves $200–$400 in professional installation fees and reduces water usage by 25–50% compared to older models.
- Proper flange inspection and cleaning before installing the wax ring is critical—skipping this step guarantees leaks and costly damage.
- Use hand-tight plus a quarter-turn when tightening bolts to avoid cracking porcelain and breaking the wax seal.
- Always upgrade to a new wax ring and stainless steel supply line rather than reusing old materials, which deteriorate and fail unpredictably.
- A DIY toilet renovation is an achievable weekend project requiring only basic tools and attention to detail, making it an ideal first step before larger bathroom renovation work.
Why Renovate Your Toilet: Benefits Beyond the Basic Upgrade
A toilet renovation isn’t just about aesthetics. A modern, efficient unit can cut water usage by 25–50% compared to older models, directly lowering your water bill. Dual-flush systems let you choose between a full flush for solids and a partial flush for liquids, adding even more savings. Beyond utility costs, a fresh toilet improves comfort, newer models come with quieter fills, softer seats, and smoother bowl glazing that resists staining and bacterial growth.
If you’re planning a larger DIY bathroom renovation or a full DIY bathroom remodel, the toilet is often the logical starting point. It’s one fixture that directly impacts daily functionality and sets the tone for the rest of your space. Upgrading also resolves leaks, which waste water silently and can damage the subfloor over time. A reliable toilet means fewer emergency calls and more confidence in your home’s infrastructure. For homeowners managing tight budgets, a DIY approach cuts labor costs significantly, installation fees alone typically run $200–$400 when hiring a professional.
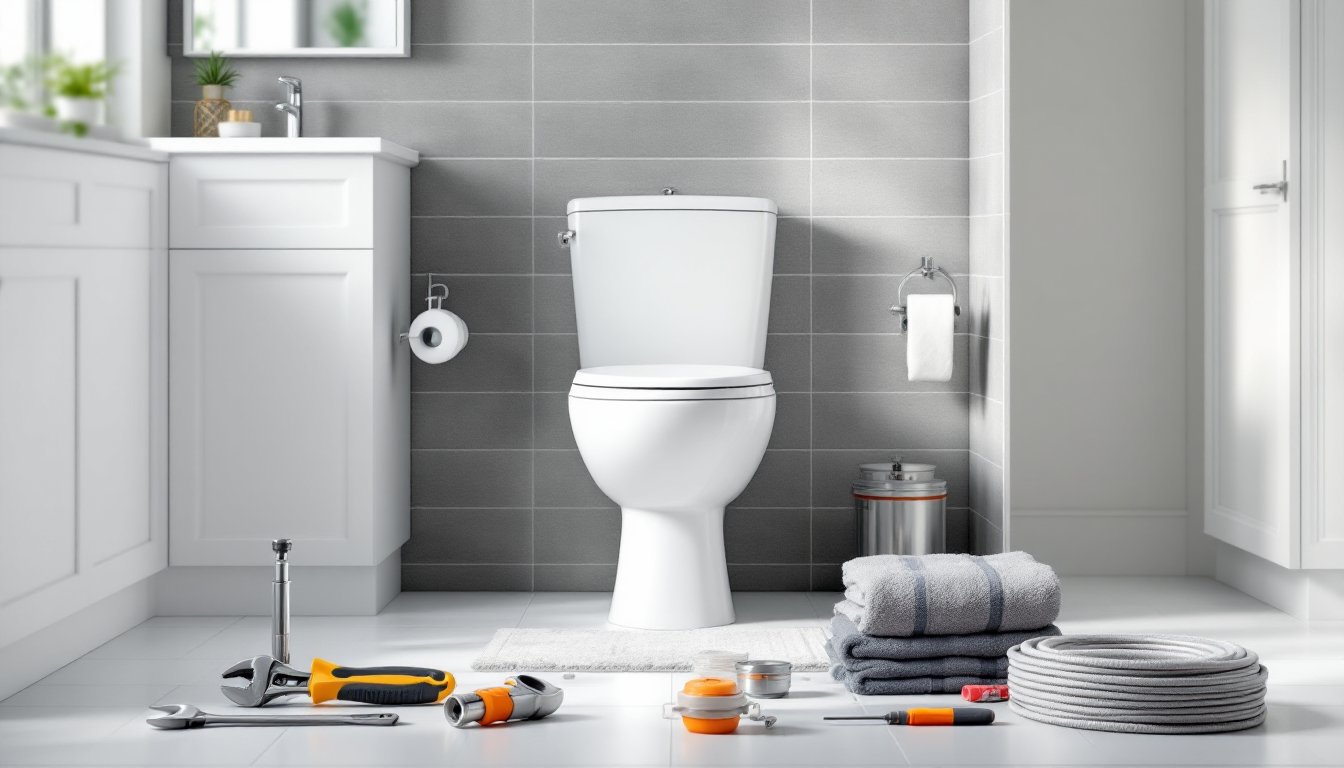
Essential Tools and Materials You’ll Need
Tools:
• Adjustable wrench (or two, to apply opposing torque)
• Pipe wrench (for supply line connections)
• Flathead screwdriver (for bolt caps and tank bolts)
• Bucket (to catch residual water)
• Sponge or towels (water containment and cleanup)
• Plunger (for safety testing after installation)
• Toilet flange repair kit (optional, only if the flange is cracked)
Materials:
• New toilet (choose ADA-compliant, dual-flush, or water-efficient models per your needs)
• Wax ring (critical for the seal between toilet and flange: standard 1/2″ fit or adjustable)
• Closet bolts (stainless steel, typically included with the wax ring kit)
• Supply line (typically 3/8″ compression, stainless steel is more durable than rubber)
• Shutoff valve (if replacing an old, corroded one)
Safety Gear:
Wear nitrile gloves throughout, you’re handling water-sealed pipes and old wax residue. Safety glasses protect against rim splash if the old wax ring crumbles. A dust mask is wise if you’re scraping old ring material. Work in a well-ventilated bathroom: close the door to contain odor and debris.
Most DIY supply stores sell combined wax ring and closet bolt kits for under $15. Toilets themselves range from $150 (basic, no-frills) to $600+ (bidets, smart seats). Don’t skimp on the wax ring, it’s the most critical seal in the entire installation.
Step-by-Step Installation Process
Removing Your Old Toilet
-
Turn off the water supply. Locate the shutoff valve behind the toilet (usually a knob or handle on the wall). Turn it clockwise until tight. Flush to empty the tank and bowl.
-
Disconnect the supply line. Use your adjustable wrench to loosen the compression nut at the base of the shutoff valve. Have your bucket ready, water may still drip. Slide the supply line away carefully.
-
Drain the bowl completely. If water remains, use a wet sponge or towel to soak it up, wringing it into the bucket. This prevents spills when you lift the tank.
-
Remove the tank bolts. Most tanks sit on two or three brass or stainless steel bolts accessed from underneath. Use your flathead screwdriver to turn the bolt head while holding the nut steady with your wrench from below. Work gently, over-tightening during original installation can crack the porcelain.
-
Lift off the tank. Set it aside carefully on a towel to catch any remaining water. The bowl stays in place for now.
-
Remove the bowl. Pop off the bolt caps on the floor (usually plastic covers hiding the bolts that anchor the bowl to the flange, the metal ring set into the floor). Use your wrench to turn the nuts counterclockwise. Rock the bowl gently side to side, then lift straight up. The old wax ring (a soft, pliable seal) will cling to the underside.
-
Clean the flange. Scrape away all old wax with a flathead screwdriver, working carefully to avoid cracking the flange. Wipe the flange surface clean with a cloth: a grimy surface prevents proper sealing. Inspect the flange for cracks or rust, if damaged, you’ll need a flange repair kit or professional help.
Preparing the Space and Installing Your New Toilet
-
Install the new wax ring. Press the new wax ring firmly onto the flange, centering it. The ring is sticky and will stay in place. Don’t remove any backing yet, it’s part of the press-fit process.
-
Position the bowl. Align the closet bolts (two studs sticking up from the flange) with the two holes on the underside of the bowl’s base. Slowly lower the bowl, applying gentle downward pressure. The wax ring compresses and forms a watertight seal. Don’t rock side to side once it’s seated, you’ll break the seal.
-
Secure the bowl. Hand-tighten the closet bolts first, making sure the bowl is level. Use a level across the rim for accuracy. Once level, tighten the nuts alternately (left, then right, repeat) using your wrench, snug but not over-torqued. Over-tightening cracks porcelain or misaligns the bowl. Typically, hand-tight plus a quarter-turn is sufficient.
-
Snap on the bolt caps to hide the bolts.
-
Set the tank. Position the tank on the bowl, aligning the mounting holes. Insert the tank bolts and tighten them in a cross pattern (top-left, bottom-right, top-right, bottom-left) to ensure even pressure. Again, snug is better than vice-grip tight.
-
Reconnect the supply line. Hand-thread the compression nut onto the fill valve inlet, then tighten with your wrench. Don’t over-torque: listen and feel for the point where it just stops leaking, then back off slightly.
-
Turn the water back on and observe the fill cycle. Listen for a hiss or rushing sound (normal during initial fill) and watch for leaks at the connections and the base of the bowl.
-
Test the flush and inspect for leaks under the bowl. Place towels under the base overnight as a final safety check. Minor seepage suggests the wax ring needs more time to set: give it 24 hours. Significant leaks mean the seal failed, you’ll need to lift and re-do it.
Resources like Family Handyman and This Old House’s bathroom guides offer video walkthroughs if you prefer visual reference.
Common Mistakes to Avoid and Troubleshooting Tips
Skipping flange inspection: A cracked or corroded flange breaks the seal. Always clean and inspect before installing the wax ring. If you spot damage, stop and repair or replace the flange, trying to seal a broken flange leads to guaranteed leaks.
Using old wax rings or installing backward: Never reuse a wax ring, it loses adhesion once compressed. Some rings have a plastic cone: ensure the cone points downward into the flange. Installing backward wastes the ring entirely.
Overtightening bolts: More torque doesn’t mean a better seal. You’ll crack porcelain or misalign the bowl, compromising the wax seal. Hand-tight plus a quarter-turn is the golden standard.
Neglecting water shutoff valve maintenance: If your valve leaks or won’t turn, replace it before starting. A failing valve leads to trouble later and wastes water between flushes.
Ignoring the supply line: Old rubber supply lines degrade and burst without warning. Upgrade to stainless steel braided lines: they cost only $5–$15 more and last decades.
Bowl rocks after installation: If the base moves, the seal is compromised. Remove and reseat the bowl, you likely under-torqued the bolts or the flange is uneven. Place shims (thin plastic wedges) under the bowl rim if the floor is slightly out of level, then re-torque.
Running or weak flush: A weak flush typically means the fill tube isn’t delivering enough water to the bowl. Check that the supply line is fully open at the shutoff valve and that debris isn’t blocking the fill valve inlet. Running toilets indicate a failed flapper seal inside the tank, this is a tank repair or tank replacement issue, separate from a rough DIY toilet renovation.
If you’re tackling broader bathroom upgrades alongside your toilet replacement, reviewing complete bathroom remodel guides helps coordinate all phases. For those managing extensive projects, a budget-conscious bathroom renovation approach ensures you allocate resources wisely across fixtures.
Conclusion
A DIY toilet renovation is an achievable weekend project that builds confidence and saves money. With the right tools, materials, and attention to prep work, you’ll install a reliable, efficient toilet that serves your home for a decade or more. The key is patience, rushing through flange cleaning or seal installation courts disaster. Start here, master this one fixture, and you’re ready to tackle bigger bathroom projects. Your wallet and your time will thank you.