Building a living room home theater doesn’t mean gutting a room or spending five figures on exotic equipment. It means making smart choices about display size, speaker placement, lighting control, and seating, all while keeping the space livable for everyday use. Unlike a dedicated theater room, a living room setup has to balance cinematic immersion with the realities of daytime TV, kids playing, and pets wandering through. The good news? With careful planning and a few targeted upgrades, most homeowners can create a theater experience that rivals commercial cinemas, without a construction permit or a contractor.
Key Takeaways
- A living room home theater balances cinematic immersion with everyday livability by making smart choices about display size, speaker placement, lighting, and seating—without requiring a dedicated room or contractor.
- Proper viewing distance for TVs should be 1.5 to 2.5 times the screen diagonal, and avoiding placement directly across windows prevents glare that compromises picture quality.
- A soundbar or 5.1/7.1 surround sound system dramatically improves immersion over built-in TV speakers; speaker placement is critical, with the center channel above or below the screen and surrounds angled toward listeners.
- Lighting control through dimmers, bias lighting behind the TV, and blackout window treatments separates a good theater setup from a great one by reducing eye strain and enhancing contrast.
- Seating eye level should align with the screen’s center (typically 42–48 inches off the floor), and elevating back rows by 12–18 inches ensures sightlines for multi-row configurations.
- Budget-conscious upgrades like acoustic foam panels ($50), dedicated streaming devices ($30–$150), and universal remotes provide significant performance gains without major investment.
Planning Your Living Room Home Theater Layout
Start by measuring the room, length, width, and ceiling height. Write them down. The viewing distance should be 1.5 to 2.5 times the screen diagonal for most displays. For a 65-inch TV, that’s roughly 8 to 13 feet from screen to seating. For projectors, factor in throw distance (the space between projector and screen), which varies by model but typically ranges from 10 to 15 feet for a 100-inch image.
Identify the room’s focal point. In most living rooms, this is the longest wall opposite the main seating area. Avoid placing screens directly across from windows, glare kills contrast, even on high-brightness displays. If windows are unavoidable, plan for blackout curtains or cellular shades.
Map out electrical outlets and cable runs. Home theater systems need multiple outlets for the display, receiver, streaming devices, and powered speakers. If your room has outlets only on one wall, consider adding a 15-amp dedicated circuit for AV equipment, this is a straightforward job for a licensed electrician and prevents tripped breakers during movie night.
Consider sightlines. Everyone seated should have an unobstructed view of the screen without craning their necks. If you’re working with a sectional sofa, angle it slightly toward the display rather than placing it parallel to the wall. For rooms with open floor plans, area rugs and furniture arrangement can help define the theater zone without permanent walls.
Choosing the Right Display for Your Space
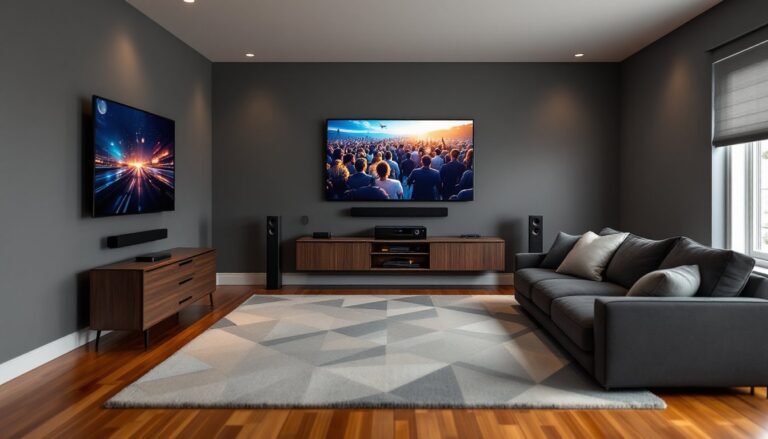
The display is the centerpiece, and the choice boils down to TVs versus projectors. TVs work in any lighting condition, require zero installation beyond mounting or placing on a stand, and deliver sharp images up to 85 inches or more. 4K resolution is standard: look for models with HDR10 or Dolby Vision support for better contrast and color range. OLED panels offer the deepest blacks, but LED/LCD models with full-array local dimming are more affordable and still excellent for most rooms.
Projectors shine, literally, when screen size matters more than ambient light performance. A quality 1080p or 4K projector can produce a 100- to 120-inch image, creating true cinematic scale. You’ll need a projection screen (fixed-frame or motorized) and a darkened room. Throw distance matters: short-throw projectors sit closer to the wall (useful in smaller rooms), while standard-throw models need 10+ feet of clearance.
Mounting hardware matters. For TVs, use a full-motion or tilting wall mount rated for your display’s weight (check the VESA pattern on the back of the TV). Studs should be 16 inches on center in most homes, use a stud finder, not guesswork. If mounting on drywall between studs, install a blocking board behind the wall or use heavy-duty toggle bolts rated for 100+ pounds. For projectors, ceiling mounts work best: they keep the unit out of the way and allow fine-tuning of angle and height. Always account for cable management, in-wall CL2- or CL3-rated HDMI cables are code-compliant for concealed runs.
Sound System Essentials: Creating Immersive Audio
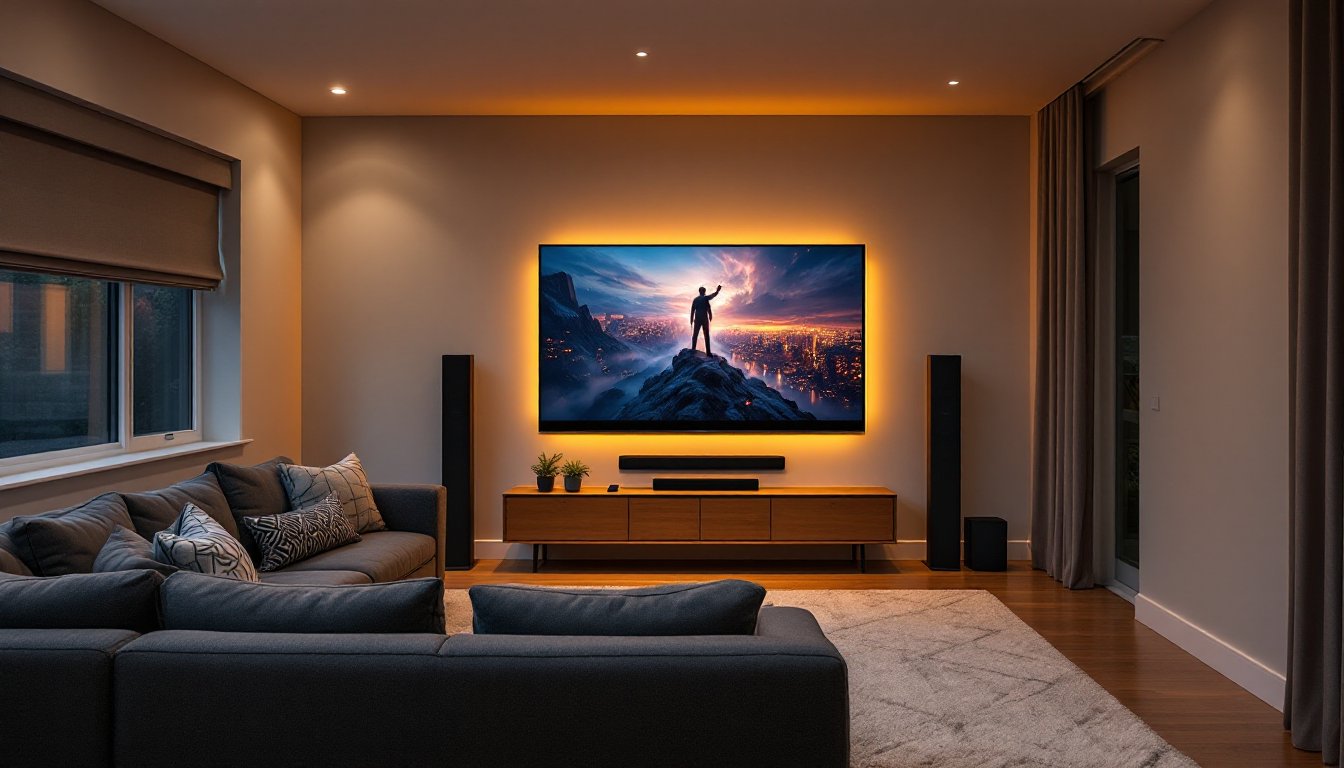
TV speakers are never enough. A true home theater starts with a dedicated sound system, either a soundbar or a multi-speaker surround setup. Soundbars are the easiest entry point: a single unit (often with a wireless subwoofer) that sits below or mounts below the TV. Look for models with Dolby Atmos or DTS:X support for height effects. They won’t match a full surround system, but they’re a massive upgrade over built-in TV audio.
For immersive surround sound, go with a 5.1 or 7.1 channel system: five or seven speakers (front left/center/right, surround left/right, and optional rear surrounds) plus a subwoofer. You’ll need an AV receiver to power and decode audio. Receivers range from entry-level (around $300) to high-end models with 8K passthrough and room correction software like Audyssey or Dirac Live.
Speaker placement follows a standard pattern. The center channel goes directly above or below the screen, it handles most dialogue. Front left and right speakers flank the screen at ear level (about 3 to 4 feet off the floor). Surround speakers sit to the sides or slightly behind the seating, angled toward listeners. The subwoofer can go almost anywhere, bass is non-directional, but corners often amplify output. Use the “subwoofer crawl” method: place the sub in your seating position, play bass-heavy content, then crawl around the room’s perimeter to find where bass sounds fullest. That’s where the sub goes.
Speaker wire is simple: 16-gauge or 14-gauge oxygen-free copper works for runs under 50 feet. Strip about half an inch of insulation, twist the strands, and secure them in the receiver and speaker terminals, red to red, black to black. Many DIYers prefer using smart home technology to control volume and source selection via voice or app, which integrates seamlessly with most modern AV receivers.
Lighting Design for the Perfect Viewing Experience
Lighting control separates a good setup from a great one. Overhead lights and lamps create reflections on screens and dilute contrast. The goal is ambient lighting that’s bright enough to navigate the room but dim enough not to compete with the display.
Install dimmer switches on existing overhead fixtures. Standard rotary dimmers work, but smart dimmers (Lutron Caseta, Leviton Decora) allow programming scenes and voice control. Wiring a dimmer is straightforward: turn off power at the breaker, remove the old switch, connect the dimmer’s hot (black) and load (typically red or black) wires to the circuit wires, and cap the ground (green or bare copper). If you’re not comfortable working with 120V circuits, hire a licensed electrician.
Bias lighting, LED strips mounted behind the TV, reduces eye strain and enhances perceived contrast. Stick-on LED strips with adhesive backing are easy to install: just clean the back of the TV with isopropyl alcohol, peel, and press. Look for 6500K color temperature (neutral white) to match standard video white points.
Blackout window treatments are non-negotiable for daytime viewing or projector setups. Cellular shades, roller blinds, or heavy curtains with blackout lining all work. For a cleaner look, mount blinds inside the window frame using the manufacturer’s brackets, most require only a drill and 1-inch screws into the frame or header. Projects like these have become increasingly popular among homeowners documenting personal theater transformations that balance aesthetics with performance.
Seating Arrangements and Comfort Considerations
Seating makes or breaks the experience. The ideal setup places viewers at eye level with the center of the screen when seated. For a wall-mounted TV, that typically means mounting the display so its center is 42 to 48 inches off the floor, roughly the same height as your eyes when sitting on a standard sofa.
If buying new furniture, prioritize seating depth and back support. Theater-style recliners are popular, but any sofa or sectional with firm cushions and good lumbar support works. Measure seat height (16 to 18 inches is standard) and ensure it aligns with your viewing distance.
For multi-row seating (if space allows), elevate the back row by 12 to 18 inches. This is where a riser platform comes in, essentially a sturdy frame built from 2×6 or 2×8 lumber, topped with ¾-inch plywood and carpeted for sound absorption. Secure the frame to the floor with construction adhesive and finish screws if building on a concrete slab, or screw into floor joists if over a basement or crawl space. This isn’t structural work, but it does change the room’s layout, check local codes if you’re making permanent modifications.
Add side tables or a console behind the sofa for drinks and remotes. Keep pathways clear, tripping over speaker wire or power cords in a dark room is a fast way to ruin movie night. Use cable raceways or in-floor cord covers to manage runs across walkways.
Budget-Friendly Home Theater Upgrades
Not every upgrade requires a four-figure investment. Start with what you have and layer in improvements over time.
Acoustic treatments are cheap and effective. Heavy curtains, area rugs, and upholstered furniture absorb sound reflections that muddy dialogue. For around $50, foam panels or fabric-wrapped acoustic tiles can be mounted on walls behind speakers to tighten bass response.
Streaming devices like Roku, Apple TV, or Fire TV cost $30 to $150 and consolidate apps into one interface. Even if your TV has built-in smart features, dedicated streamers are faster and get software updates longer.
Use universal remotes or smartphone apps to control multiple devices. Logitech Harmony remotes (now discontinued but available used) or modern alternatives like Sofabaton simplify operation, one button press powers on the TV, receiver, and streaming box simultaneously.
Upgrade HDMI cables only if you’re running 4K at 120Hz or 8K content, otherwise, basic high-speed HDMI cables (certified 18Gbps or higher) handle everything. Don’t overspend on “premium” cables with gold-plated connectors: they make no audible or visual difference in runs under 15 feet.
For inspiration and detailed project walkthroughs, many DIYers turn to resources showcasing home renovation ideas that blend function and style, especially when working within a fixed budget.
Conclusion
A living room home theater is a series of deliberate choices, each improving the experience without locking the room into a single purpose. Measure twice, plan speaker placement before drilling, and don’t skip acoustic treatments or lighting control. The result is a space that works for weeknight TV and weekend movie marathons, all without requiring a dedicated room or a contractor. Start with the display and sound system, then layer in comfort and control as budget allows.