
A kitchen remodel doesn’t require a contractor’s budget or a six-month timeline. With solid planning, the right tools, and realistic expectations, you can transform your kitchen into a more functional and attractive space yourself. Whether you’re looking at a full DIY kitchen renovation or tackling specific upgrades, this guide walks you through the most impactful projects for homeowners ready to roll up their sleeves. The key is understanding where to invest effort and which upgrades deliver the best return on both investment and daily usability.
Key Takeaways
- A DIY kitchen remodel can transform your space affordably by starting with high-impact, low-cost wins like paint, hardware, and lighting before tackling structural projects.
- Assess your skill level honestly and always check local building codes before attempting electrical, plumbing, or load-bearing wall work—some projects require a licensed professional.
- Budget 10–15% contingency for surprises, research actual material costs in your region, and track all expenses to stay on track and understand your return on investment.
- Fresh paint with new hardware can make a kitchen look professionally remodeled for under $500 when combined with updated cabinet finishes and brushed metal or matte black fixtures.
- Lighting upgrades, including under-cabinet LED strips and new ceiling fixtures, dramatically improve how a kitchen looks and functions for relatively modest time and expense.
- Backsplash installations and countertop overlays offer visual impact and satisfying DIY results, while peel-and-stick tile options provide renter-friendly alternatives to traditional tile work.
Assess Your Current Space and Set Realistic Goals
Before you touch a single cabinet or wall, walk through your kitchen with a critical eye. Take photos from multiple angles, measure the room, and identify what frustrates you daily, is it storage, lighting, countertop space, or overall aesthetics? These pain points tell you where to focus effort.
Next, be honest about your skill level. Painting cabinets and installing hardware? Totally doable for a weekend warrior. Rerouting plumbing or gas lines? That typically requires a licensed professional and a permit. Your local building codes vary, so check with your municipality before starting structural work or anything involving electrical, plumbing, or load-bearing walls.
Set a realistic budget. Don’t just pick a number, research actual material costs for the upgrades you want. A fresh coat of paint runs $100–300: new hardware costs $50–400 depending on quantity and style: countertop materials range from $100 to $300+ per linear foot installed. Once you know what things actually cost, set a contingency fund of 10–15% for surprises. Old kitchens hide surprises: water damage, hidden plumbing, or structural quirks that show up mid-project.
Plan Your Budget and Timeline
Start by listing every project you want to tackle, then prioritize ruthlessly. High-impact, low-cost wins, like paint, hardware, and lighting, should come first. Save structural or major fixture work for later phases if budget is tight.
Create a realistic timeline. A simple DIY bathroom remodel might take 3–4 weekends: a kitchen overhaul can stretch across 2–3 months if you’re working nights and weekends. Factor in drying time, delivery delays, and the inevitable moments when you realize you need to redo something. Don’t rush, poor prep work or hurried installation creates problems that cost far more to fix later.
Break your budget into categories: materials, tools (if you need to buy or rent), and contingency. Use online cost estimators on ImproveNet or HomeAdvisor to cross-reference typical project costs in your region. Prices vary wildly by location and current market conditions, so base your estimates on local data, not national averages. Track every expense in a spreadsheet, you’ll need it to stay on budget and to understand your actual ROI if you ever sell.
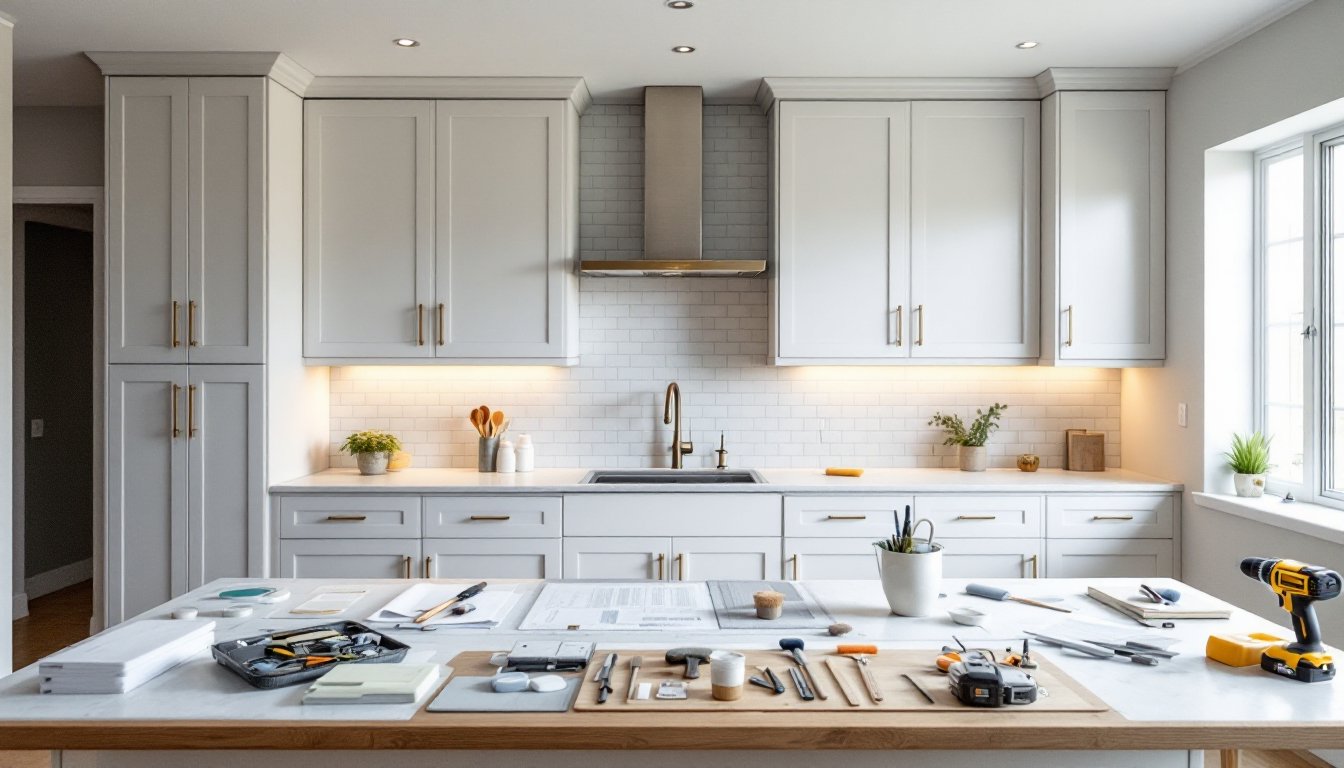
Paint and Hardware: Quick Wins for Maximum Impact
Fresh paint transforms a kitchen faster than almost anything else. Choose a high-quality, semi-gloss or satin kitchen paint, these finishes resist moisture and are easier to clean than flat paint. Prime any bare wood or stains first: if you’re painting over existing cabinets, use a bonding primer (also called adhesion primer) so the new finish sticks.
For cabinet paint, plan on two coats. Use a quality brush or foam roller to avoid brush marks. Cabinet painting takes patience but costs a fraction of replacement. If your cabinets are solid wood and in decent shape, refinishing them often beats buying new ones.
Swapping hardware is a psychological reset that costs $50–400 depending on how many drawers and doors you have. It takes an afternoon and a power drill. Measure the hole spacing on your existing hardware first, standard is 3 inches center-to-center on drawers, 32 inches on cabinet doors, but older kitchens vary. Mismatched holes? Fill the old ones with wood filler and drill new ones. Modern hardware in brushed nickel, matte black, or brass instantly reads “updated” without touching anything structural. New paint combined with new hardware often makes a kitchen look like a professional remodel for under $500.
Upgrade Lighting and Fixtures
Poor lighting ages a kitchen. If you have old recessed lights or a single overhead fixture, adding task lighting under cabinets and swapping out the main fixture is a high-ROI project. Under-cabinet LED strips cost $30–100 per 10 feet and plug into an outlet or hardwire into a switch (hardwiring requires turning off power at the breaker, if you’re not comfortable with that, hardwire it or stick with plug-in versions).
Replacing a ceiling fixture takes 30 minutes. Turn off power at the breaker, remove the old fixture, and install the new one following the manufacturer’s wiring diagram. Most DIYers can handle this, but if you’re unsure about electrical connections, hire it out, a loose connection isn’t worth a fire risk.
Faucet replacement is straightforward if you’re comfortable working under the sink. Turn off the water supply (shut-off valves are usually under the sink), disconnect the old faucet, and follow the new one’s installation instructions. Some faucets need a new sink hole drilled: others fit existing holes. Check before you buy. A stylish faucet costs $100–400 and instantly upgrades the kitchen’s focal point. When planning updates, remember that kitchen design decisions should balance aesthetics with daily function, choose fixtures that won’t frustrate you every time you use them.
Tackle Countertops and Backsplash Updates
Cabinet Refinishing vs. Replacement
Countertops set the tone and take abuse, so choosing the right material matters. Laminate (Formica-style) is budget-friendly ($20–40 per linear foot) and improves the look if your existing tops are stained or damaged. Butcher block adds warmth but requires maintenance (food-safe oil, no prolonged moisture). Quartz offers durability and is nearly maintenance-free ($80–150 per linear foot installed). Granite is classic but porous and needs sealing ($60–100 per linear foot installed).
If you’re confident with tools, consider a countertop overlay, a thin laminate that adheres to existing counters. It’s cheaper than replacement and works if your base is still structurally sound. For full replacement, most DIYers hire out because it involves precise cutouts for sinks and appliances. If your cabinet layout is staying the same, resurfacing might save money and time.
Backsplash is pure visual impact and a great DIY project. Subway tile, hexagons, or peel-and-stick options all work. Peel-and-stick tiles ($1–3 per tile) are renter-friendly and require only a clean surface and a utility knife. Traditional tile needs a notched trowel, thin-set mortar, grout, and a grout float, more skill but equally satisfying. A 10-square-foot backsplash costs $50–200 in materials depending on tile choice. Doing a complete kitchen renovation is ambitious, but backsplash alone makes the space feel intentional and updated.
Conclusion
A DIY kitchen remodel succeeds when expectations match reality. Start with paint, hardware, and lighting, quick wins that build confidence and deliver visible results. Phase in more complex work as your skills and budget allow. Measure twice, prep thoroughly, and don’t skip the unglamorous steps like priming and sanding. Your future self will thank you when the finish holds up and the project stays on budget. The kitchen you remodel with your own hands won’t just look better, you’ll appreciate it more every single day.


